This week, we bring you the best bits of technology from the world of engineering including a guiding light into the workings of a retroreflector, the dual life of bi-stable structures, and a new way to harness energy from our rivers. Plus, we unearth the workings of a copper mine, discover how Barnes Wallis designed his famous bouncing bomb and bring you an atomic insight into the art of metalworking!
In this episode
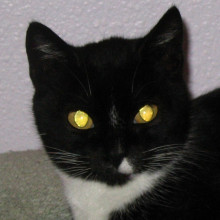
02:28 - Naked Engineering - Cat's Eyes and Retroreflectors
Naked Engineering - Cat's Eyes and Retroreflectors
with Dr Hugh Hunt, Cambridge University
Ben - Whilst driving on motorways or busy roads at night, many of us will have noticed the small beacons of light in the middle of the road that help to position and guide us on our travels. You probably know that these are called cat's eyes and this week, Meera and Dave have been out investigating exactly how they work...
Meera - For this week's Naked Engineering, Dave and I are 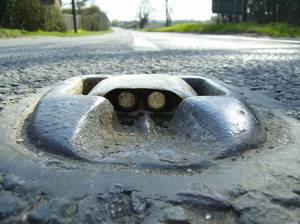 joined by Dr. Hugh Hunt from the University of Cambridge. Now Hugh is a Fellow of Trinity College so we're here inside his office inside of the college. Dave, why are we here? What particular challenges of engineering are we going to be looking into?
Dave - Well have you ever driven along the road in the dark and, especially if it's a bit misty, it's really hard to see anything driving past. Even if someone's wearing a bright white shirt, the actual amount of light which gets reflected back to you is very, very limited. So there's a big engineering problem of finding a way of making objects really bright when you drive past them.
Meera - So Hugh, we have a variety of mirrors here in front of us. What will we be doing with these to tackle the challenge of making things visible at night time?
Hugh - Well we know for instance that the headlights from a car are very bright. So I've got a little torch here and if I stare straight into it, it's very dazzling. And if I have a mirror, I can reflect the light into my eyes, and it's also very dazzling.
Meera - The light is just coming straight back at you.
Hugh - The light is coming straight back. If I have a piece of white paper - well, it's not at all dazzling.
Dave - I guess a normal mirror will shine light straight back at you, but as soon as you get the angle slightly wrong, that beam is going to miss your face, and it's not going to look very bright at all.
Meera - So the challenge there is designing something that can catch light from many angles and still make it visible back at you?
Hugh - Exactly right, Meera. Now one thing you might have noticed, if you've ever been into a bathroom where there are two mirrors side by side at right angles to each other, it's quite interesting to look at what happens. So I've got a couple of mirrors here, just at right angles to each other. Now Meera, if you look into the mirror, you will see that your reflection is at the intersection of the two mirrors.
Meera - Yes, I can see myself at the intersection, at the joint.
Hugh - Now what's really interesting is if you move your head from left to right, your reflection will always be at that intersection.
Meera - That's right. It's not moving.
Hugh - And it's almost as if you've got a perfect plane mirror which is always pointing at you. It compensates for the movement. Wherever you're looking from, it always reflects directly back at you. Now if you take a light, I've got a little torch here, and you held it by your eyes, you'll find that all rays reflects directly back at you.
Meera - Yes and it's coming straight back at my eyes. Actually, it's hurting a little bit!
Hugh - This is the basic principle of what's called a retroreflector. It reflects directly back at you and it works because, if you do the angles of reflection of the two mirrors, when you add up the two sets of reflections, the total angle of reflection is always 180 degrees. So, whichever direction light goes into these pair of mirrors, it comes back at 180 degrees.
Dave - So this works great if you're moving left or right, but at the moment, if you move up and down, your image moves, so it's not going to work very well like that. How do we get around that problem?
Hugh - The next clever trick is to have three mirrors at right angles. So imagine you go into your bathroom and you've got one mirror on the floor and two mirrors at right angles on the walls...
Meera - Which you've now constructed here...
Hugh - ...that I've now constructed, well where do you see a reflection now, Meera?
Meera - It's at the intersection, but of where all the three mirrors meet.
Hugh - Right. Now, if you take the torch and you put that by your eyes, you should find...
Meera - Oh, it's glaring back at me.
Hugh - And as you move left, right, up, down, any direction...
Meera - The light is just chasing me...
Hugh - Always, it's quite spooky.
Meera - So whereabouts these retroreflectors used then?
Hugh - Well, they're used in all sorts of applications. So perhaps some of the common ones that we're most familiar with, are reflective clothing, reflectors on the side of the road, and even reflectors on your bicycle. They are retroreflectors and they all work, generally speaking, on the principle of this corner-cube idea, the three mirrors at right angles, and in fact, it's called a corner-cube.
Meera - So that is quite a wide range of uses really, but Dave, another use of them that's quite commonly known is cat's eyes that we see dividing lanes on the road for us to see lane markings and essentially see when we're driving on busy roads at night.
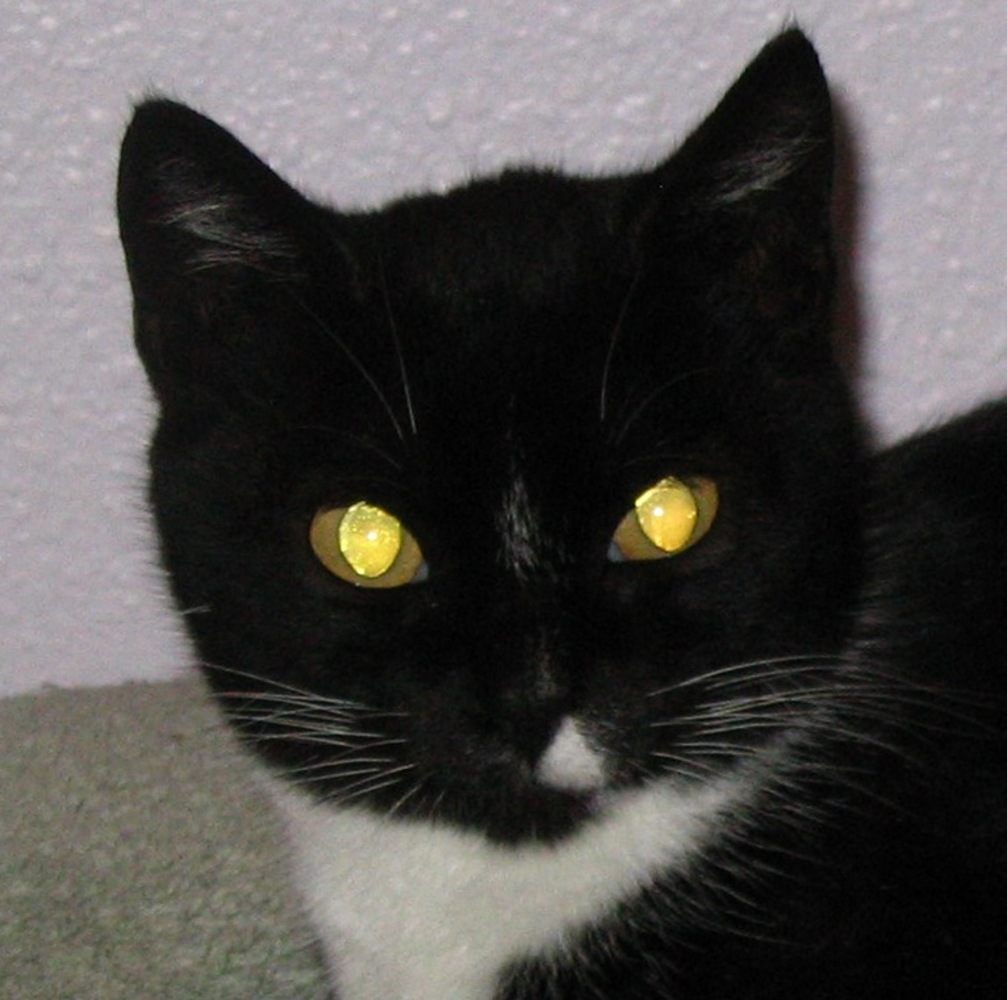 Dave - That's right. In the '30s, there was a guy called Percy Shaw who was driving on the road and suddenly discovered it's really, really hard to follow the road in the mist, in the dark, and then he saw some cats, and their eyes were shining back really brightly. If you've ever shone a torch at a cat, you see their eyes reflecting incredibly brightly.
Meera - This is because they have reflectors essentially at the backs of their eyes.
Dave - Yeah, their eyes acts as retroreflectors, so he attempted to copy these and then put them on the road.
Meera - We have some of these cat's eyes here with us. So how do these actually work, Hugh?
Hugh - They work by taking the light coming out of our headlights and shining it directly back at us and there are some really neat things about the design of these cat's eyes. Firstly of course, they're optically very good and they reflect the light back, but what would happen if they got covered in mud or grit and stuff from the road? One of the really lovely things about this particular design is that every time you drive over them, there's a little rubber flap at the front, a bit like eye lashes really, and the very action of driving over these things...
Meera - Pushes it down...
Hugh - Pushes the cat's eyes down and clears the mud off them and it's just such a beautiful piece of clever engineering because of course, this has to be designed so that over the lifetime of these cat's eyes, you've got several million lorries passing over. They've got to survive cold winters, snow ploughs, they've got to survive hot summers.
Meera - So do these cat's eyes follow the main principles we've been talking about then with corner-cubes?
Hugh - Well, there are different types of cat's eyes. The ones that were developed in the '30s are actually more like a combination of lenses, and in fact, operate much more in the way a cat's eye actually works.
Dave - Yeah, that's right. If a cat's looking at something bright like a torch, the light from the torch will get focused onto its retina, so it gets an image of the torch, but the cat's eye's got a reflecting membrane at the back of the eye which reflects the light straight back the way it came, out through the lens which focuses the light, exactly straight back towards the torch which is putting the light out in the first place.
Hugh - It's really very nice little bit of geometry and looking at how you can design a lens and a mirror, a curved mirror, a curved lens such that you get the light to come straight back the way it came in. But it's much cheaper and much easier to make a corner cube idea. You can just press them out of a piece of plastic, make cheap reflectors for your bikes, and those sorts of reflectors are used on the posts on the side of the road. They're not driven over and they don't get covered in mud and grit from the surface of the road. They're just much more like bike reflectors that are stuck under the posts.
Dave - And you sometimes get them stuck onto the road, but they tend to be the ones which fall off within a couple of years.
Meera - But also, along the motorways and things, you see different colours of these cat's eyes to mark out say, the hard shoulder and things like that. How do these work?
Hugh - It's just a coloured plastic or coloured glass. So in the same way as if you shine a light through a piece of red plastic, the light turns red. So if you make the plastic coloured red, it'll be red.
Meera - So there are just such a wide range of uses for the concept of reflection.
Hugh - Well, it's wonderful. It's one of these things that if you actually stop and think about how they work, it's not obvious. When you find out how they work, it's just fantastic to understand it.
Ben - So, some basic principles of physics get engineered to help us see at night. That was Dr. Hugh Hunt from the University of Cambridge, talking to Meera Senthilingam and to Dave Ansell.
10:23 - Naked Engineering - Green Tide Turbines
Naked Engineering - Green Tide Turbines
with Michael Evans and Tom Clark, Green Tide Tubines.
Small scale turbines that can harness energy locally from winds, tides, and rivers can be a very valuable asset in bringing power to remote populations which makes the technology that a company called 'Green Tide Turbines' are working on potentially very valuable. Meera and Dave went to meet Green Tide Turbines' CEO, Michael Evans and his colleagues to find out a bit more.
 Michael - Well, if we're talking about a tidal turbine, we're developing technologies that have to survive some of the most aggressive environments in the whole planet. We've got heavy moving water which contains huge amounts of energy, often in very remote locations which are very hard to access because obviously, you've got these very strong tidal currents, and also, some extremely large forces, which is the whole reason why we want to put turbines there, to tap some of that. So, the emphasis really needs to be on devices that are really, really simple, very easy to maintain, very robust, and also, quite cheap.
Dave - I guess the different thing to do would be to take the main technology like take a wind turbine and stuff it underwater.
Michael - Absolutely. A lot of our competitors have followed that very philosophy. Basically, they've just got wind turbines with shorter blades that are made to be waterproof, and they dump them under the sea. The sea just isn't water. There's lots of stuff that it carries in it. Things like fishing nets, even submerged containers that have been washed off ships for instance. These all find their way into these fast moving flows of water and they're basically flung at these devices. So you've got these wind turbines with their delicate blades spinning around in a flow regime and when these things get hit by these objects, they're not going to survive particularly well.
Meera - To tell us more about how the Green Tide Turbine design approaches these challenges is Tom Clark who is the Research Director...
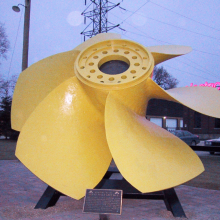
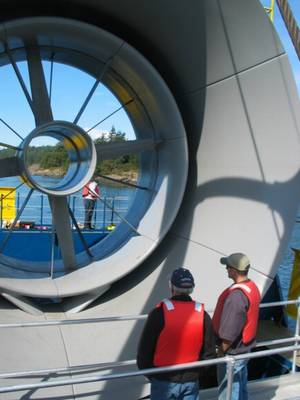
Tom - Well we have a different kind of concept which is moving away from the "wind turbines underneath the sea". What we do is we put much smaller rotors inside a duct which allows us to capture a similar amount of energy, but using a much smaller and more robust rotor.
Dave - I guess the first thing I'd say if you've got a very small rotor and you're squirting lots of water past it, surely if it is moving very fast, this turbine should be spinning very quickly and kind of mash anything which it hits.
Tom - That's right. But what we've been able to do, Dave, is use both the stator and a rotor. So, a stator is essentially like a rotating turbine but fixed in position. What that does is it causes a swirl of fluid inside the duct and then the rotor takes out that swirl and generates energy by doing so. So, although the rotor is moving fairly fast, it's not moving as quickly as perhaps a design without a stator.
Meera - So you're regulating the flow of water approaching the rotor?
Tom - That's right. That has the additional benefit actually that any turbulence and gustiness in the incoming stream is actually straightened and aligned as well. A lot of people don't realise it, but the tides don't move just uniformly. There's a lot of turbulence, swirling eddies, and so on, and currents which upset the behaviour of turbines in the current. The benefit of our design really is that you can actually stack our turbines closer together in a tidal farm than with open tide turbine designs.
 Dave - So your system's causing the water to spin and then you're changing the direction of that spinning water completely using your rotor, so because you changed direction a lot, you don't need to be moving the rotor as quickly.
Tom - That's right, yes because we have a swirling motion in the inside of our duct, our rotor can be moving much more slowly. Effectively, it moves with the water. So there's less of a relative speed between the water and the rotor. So, it's much less damaging for fish and it's much less likely to get debris and other objects caught in the flow through the turbine.
Meera - You mentioned that they can be situated quite close to each other, but what's the actual dimensions of the turbines?
Tom - Our tidal turbines in general are in the range of 10 to 15 metres in outside diameter. But the ducts are quite big so the rotors are actually substantially smaller than that, of the order 6 metres.
Meera - We're at one of your test sites now which is alongside a river and you've got a tunnel through which water is flowing through. It's about 1.5 to 2 metres wide, and you've got one of your turbines placed in the middle. It's about 1 foot wide in diameter. Tell me a bit more about how this setup works.
Tom - Well it's called a Venturi arrangement. Essentially, there's a nozzle which accelerates flow into our turbine for the purposes of testing because we need a higher flow rate to accurately test the turbine. So, the flow rates that we reach in the test section of our water tunnel are around about 2 metres per second. The action of the duct around the turbine actually accelerates fluid through the turbine disc which means that the velocity inside the duct is slightly higher than the mean flow rate. It's about 2 ½ or 3 metres per second. We have a part of the flow of a river diverted through our test facility. We can control the facility, we can control the flow rate of the river using a sluice gate up in front of our turbine.
Meera - Can we see it in action then?
Tom - You certainly can. All we need to do is open up the sluice gate.
Meera - Right. So the sluice gates are open and the water is now just flooding through!
Tom - That's right. Flowing through the tunnel is about 3 cubic metres per second of water. We've got water travelling up to 2 metres per second.
Meera - Going through then the turbine, how much power will be generated here?
Tom - That corresponds to a power of about 500 watts. It really isn't very much. That's about half a household kettle, but I should say that it's a very, very small model that we're using. The energy capture scales up dramatically as you increase the diameter up to a tidal turbine scale. Our commercial scale turbines typically produce around 1 megawatt of power which is useful, I think that generates enough power for about 300 homes.
Meera - Having seen this in action then, now moving back to you Michael, where is it hoped these turbines will be used? What are the upcoming projects?
Michael - Well we've had a great deal of interest from developing countries where there's lots of rural communities well away from established infrastructure needing power and relatively small amounts of power. Generating power for lighting, for running mobile communication systems, and things like that. One country in particular who were very keen on our technology is Brazil. So this will be on a scale of about 1 metre in diameter installed in probably Northern Amazon region initially. That'll be generating around about 5 kilowatts of energy.
Dave - If you're going to put diesel generators up there, you still have to ship the diesel up there regularly. So, this is even less hassle than that.
Michael - Absolutely and on top of that, you know, you've got a lot of enthusiasm for clean technologies, and other alternatives such as photovoltaics and wind wouldn't really work in a rainforest type of environment, where obviously you've got lots of clouds most of the day. And also, with the trees, there's not very much wind at usable level. So, the river generation technology is ideal for this sort of environment.
Dave - So although you started off building a tidal turbine, you ended up putting it in rivers instead.
Michael - Making smaller turbines is a lot cheaper obviously and we need to prove our technology. The river turbine is a fantastic test bed to actually develop the technology.
19:10 - Separating Metals from Mud - Mining Technologies
Separating Metals from Mud - Mining Technologies
with Professor Jan Cilliers, Imperial College London
Diana - An important resource that we find in deep dark places are the metals and minerals we need for industry and everyday life, which means that mining minerals like copper and platinum is a multi-billion pound industry. Dave and Meera have been out exploring how you separate the metal we do want from the rocks we don't...
Meera - This week, Dave and I are exploring the process of mining, so where our metals and our minerals actually come from. Dave, it's not as simple as just digging them out of the ground, is it?
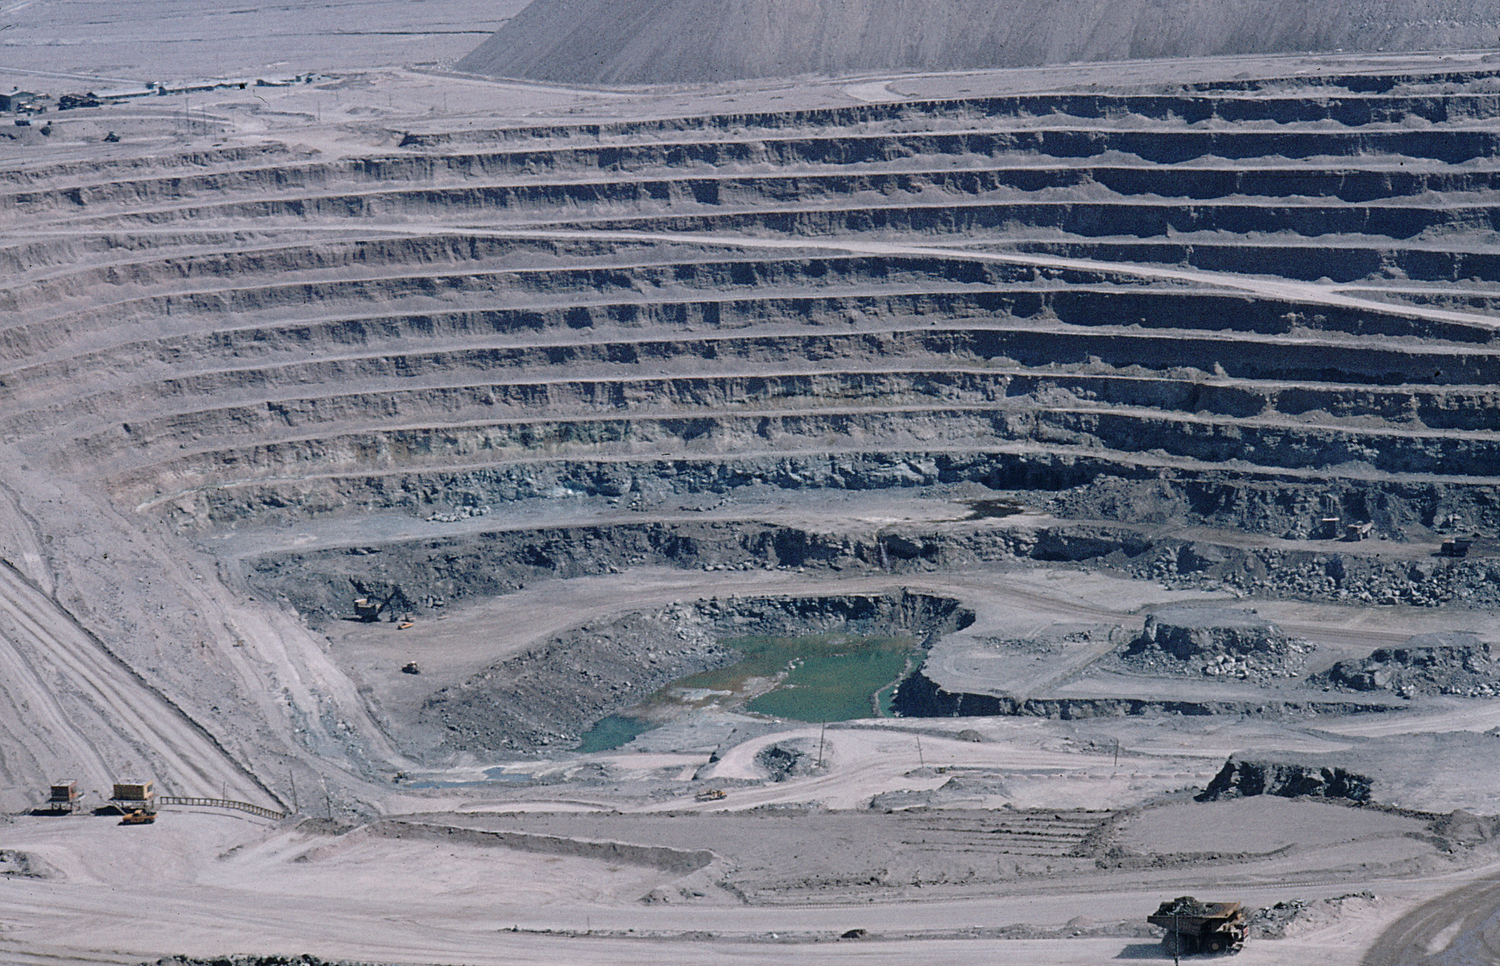
Dave - That's right. When you normally think about mining, of course you think about digging stuff out of the ground and then you learn in school about taking those ores, smelting them, and turning them into a useful metal we can use every day. However, there's a big, really important process inbetween that. The ore which we dig out of the ground is a combination of rock and the useful minerals we want. The problem is the proportion of the useful minerals can be only 1 or 2 percent, and that's still worth extracting. And this process of extracting the valuable minerals out of the rock is incredibly difficult. Originally, this was done by processes like panning, you swirl water over a mixture of sands and the densest ones fall to the bottom, but doing this on an immense scale is a very, very difficult process.
Meera - Well one scientist looking into this separation process is Professor Jan Cilliers from Imperial College London. We've come down to the Royal School of Mines in Central London to find out more about this.
Jan - I think maybe we should take a step back and just look at the scale of the mines we're dealing with nowadays. The copper mines we're talking about treat literally tens of millions of tonnes of rock a year to produce hundreds of thousands of tonnes of copper. But within the mine, maybe only 2 percent of the rock we mine is valuable mineral and the other 98 percent is waste. In order to do the separation between the valuable minerals and the waste minerals, we need to grind them very finely down to, let's say less than a tenth of a millimetre before we can do the separation. This is called liberation. Once we've ground up the rocks and they're liberated from each other now, we actually want to do the separation from the valuable minerals to the non-valuable ones. The work horse of mineral processing nowadays where we have to separate out these very small amounts of minerals from each other is a technique called froth flotation which depends on the hydrophobicity differences between different minerals. In this case, we make the one mineral we do want hydrophobic, meaning water-hating, blow air through this mixture, a slurry, or almost a mud of the mixture of minerals, the hydrophobic particles stick to the bubbles, float to the surface, and form a continuously overflowing froth that contains all our valuable minerals.
Dave - So are the valuable minerals chemically different so that your additive can make them hydrophobic?
Jan - They have to be and in this case, nature has made it so, that the valuable minerals are sulphide minerals, they are copper iron sulphide, or copper sulphide, something like a chalcopyrite as it's called versus an oxide mineral which is our gangue or our waste minerals, the other 98 percent is that. So, it's quite straightforward for this chemical to attack the one mineral versus the other one, and make it hydrophobic, whereas it ignores the other ones and leaves them hydrophilic, or water-loving.
Meera - What is the chemical used to make them hydrophobic?
Jan - We use two chemicals commonly. The first ones are the xanthates and the second ones are the diathocarbonates, and they both are long hydrocarbon chains with a reactive front end that looks for sulphur and it attaches to the sulphur, or chemically attaches to the sulphur, leaving a long hydrocarbon chain in the solution that looks oily and makes the mineral look hydrophobic and act like it hates being in water.
Meera - So what types of minerals is this process used to extract?
Jan - Pretty much all the base metals; copper, lead, zinc primarily. Many of the other metals are associated with the base metals, so platinum comes up as a nickel-copper type deposit, silver often comes with lead, and in all the major gold mines in the world now, the gold is actually a by-product of the copper production.
Jan - At the moment, the flotation process for copper accounts for about 70 percent of the world's production. If you look at a typical mine in North America or in Chile where the mass of copper mines are nowadays, a typical mine would maybe treat 10,000 tonness of rock an hour. That's a cube of rock 15 metres by 15 metres by 15 metres every single hour. So, the scale and the tonnage is just unimaginably large.
Meera - And the tanks themselves then that the rock is in and the bubbles are being pushed through...
Jan - The biggest tanks nowadays are 300 to 400 cubic meters each and a typical mine would have 60 to 70 of these tanks in a row. So yes, we're talking about aircraft hangers of froth.
Meera - This process has been used for about 100 years now. We're in your lab where you study the foam and flotation process. What aspects of this are you studying to further it or enhance it?
Jan - We've been looking at the physics of the froth; the bubble size, the velocity at which it flows, and what variables affect that.
Meera - We've got a large water bucket/tank in front of us with a gutter around it, with many tubes going in, many tubes coming out, laser monitors on top, as well as cameras attached. So, I imagine you initiate a foam here, but what are you actually monitoring and how?
Jan - As you see, the tank is containing our slurry. The froth is forming inside them, overflowing the edge into what you call the gutter or we call the launder, and then overflows into a re-circulation tank, and through the pump as you can see. What we're measuring is two things. The one is the height of the foam overflowing the edge of the tank and the velocity which we measure with a video camera, you can see in the back there. We are trying to measure the volume of the froth overflowing, so we need a velocity and we need a height, and of course, we know what the length of the lip is. If we multiply those three together, we get the volume of the froth.
Dave - I guess the depth at which the froth is overflowing is quite important because if it hasn't had time to separate out, and you're sort of pumping froth through too quickly, you're going to get lots of other minerals mixed in and if you go too slowly, you're just not going to get enough production from your system.
Jan - What we've discovered over our years of research is that the rate at which the bubbles are bursting on the top surface is the critical parameter for controlling this process.
Dave - So if the bubbles are bursting, you're essentially losing the separation which the bubbles have done already for you.
Jan - If there's too much bursting, we lose the mineral we want. If there's too little bursting, we collect too much of the minerals we don't want and it's that delicate balance that we're trying to optimise. The main variable to control the rate of bursting is how much air we put into the tank.
Meera - Is this something that's controlled and monitored on industrial mines at the moment?
Jan - In some mines, it is. It's not necessarily controlled although there is move towards that. We'd like to see that implemented far more widely and that this technique of monitoring the volume of froth overflowing is used as a control measure. If you look at a typical copper mine, we recover about 90 percent of the minerals that come in to our process and we lose about 10 percent. If we push that to 91 percent, that extra percent is worth, say, $20 million per annum. So there's big incentive for us to get this right.
Diana - What a lot of money! That was Jan Cilliers, Professor of Minerals Processing at Imperial College London, taking Meera and Dave through the copper separation process.
26:06 - Naked Engineering - Bistable Structures
Naked Engineering - Bistable Structures
with Dr. Keith Seffen, Cambridge University
Meera - This week on Naked Engineering, Dave and I have returned to the Structures Lab in the engineering department here at the University of Cambridge, but this time, we're looking into shape changing structures. So, as the name suggests, these are structures that change their shape, but Dave, tell me a bit more about why these are so special?
Dave - If you're a conventional engineer building something like a bridge, or a car, or an aircraft carrier, you want it to do things which are very, very predictable. So you tend to use big lumps of solid materials which stay in one shape and you might have joints in between them but the actual materials themselves are always the same shape. And so, what we're looking at today is structures in which the whole structure can actually reconfigure itself and change shape.
Meera - And one person working with these structures is Dr. Keith Seffen who's from the Advanced Structures group here. Now Keith, you've got something most people are familiar in your hand, it's a snap bracelet...
Keith - Indeed it is, Meera. As you can see, it's got a little bit of plastic covering on it but it's predominantly straight or it is straight in one configuration, and if you flick it against your arm, it'll wrap around it and adopt a circular shape.
Dave - This has got two configurations. One where it looks straight but if you 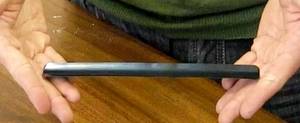 look carefully at it, its curved in the other direction just very slightly. The second one is when you wrap it around your wrist and it's essentially just a straight coil in one direction.
Keith - That's right, Dave. If we take it apart, if we remove the plastic sheath, it looks like a tape measure. Straight in one configuration, but curved gently across its width and in the other configuration, wrapped up a bit like a tape measure, sitting inside a cassette spool.
Meera - So, this is something many of us have seen, but how does it actually work? How is it possible for it to have these two configurations?
Keith - Well your ordinary tape measure won't have this. It will just want to be straight. What you have to do is manipulate it. Create or embed the second shape; the desire to be curved.
Dave - So you're basically just distorting the metal itself, plastically deforming the tape.
Keith - What you can do if you can get hold of a length of the tape is to cut a length, wrap it into a coil, wrap it around a pencil perhaps, or your finger, and try and pull it as tightly as possible. What that does is to permanently deform the tape measure into the circular position. It likes to be in that shape, but if you then pull it straight, it will prefer to be in that shape as well, and that creates this bistable property, where it desires to be in both configurations at once.
Meera - So you've now rolled up this tape measure quite tightly around your finger and opened it up back up. So now, with just certain pressures or just pushing on certain points, it should just flick.
Keith - That's right. If you just take it and push in the middle, as you can see and hear, it sort of pops into the cylindrical configuration or the wrap-around configuration. And then you have to physically unravel it to create the straight structure again. What you need however is two very different shapes for this to work and in the case of a tape measure, it's long across its length but curved across its width, and that changes when you wrap it around your finger. When you wrap it around a pencil, it becomes flat across its width and coiled along its length, and it's that antagonism that permits the properties that you see. The shapes are so different that to physically move from one to the next, you have to come along and break it with your finger or push it in the right place.
Meera - Can this also be used in other types of materials as well?
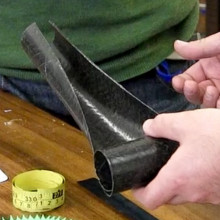
Keith - Sure thing. We have different engineering materials; a popular lightweight structural material is carbon fibre, and we work closely with a company that make tubes from carbon fibre that have the same bistable property. I've got an example here of one where we've actually tuned the properties so that it prefers both to be straight and to be coiled at the same time whilst you're holding it, and we call that a neutrally stable structure.
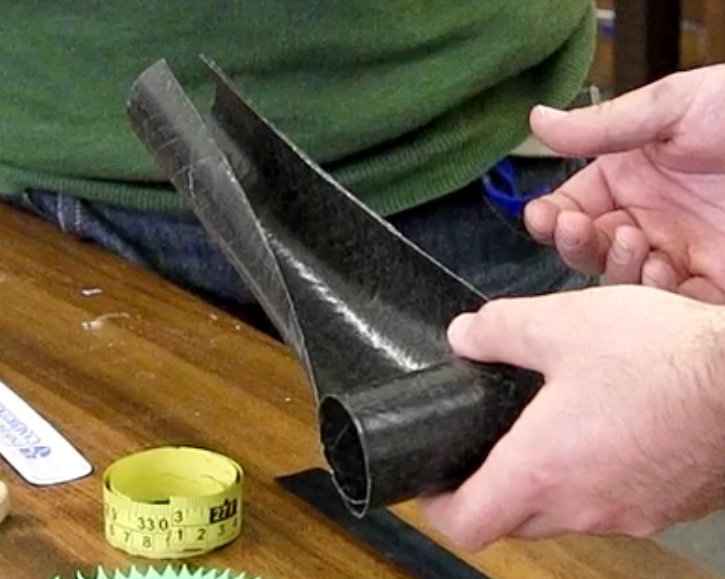 Dave - So, it's not snapping between one to the other. It's just moving very gently.
Keith - That's right. In the previous structures, there is a desire to be in both shapes, at the same time, they can only occupy one shape at a given time. Whereas this one can occupy both and it occupies both by having part of it straight and part of it coiled and a funny transition region in between.
Dave - I guess this is a really neat way of storing a very, very long tube. If you want a long tube or something, you can just roll it up the other way and it turns into a short, fat, easily storable object.
Keith - And in addition, because it's quite happy to be extended to any length, you can have a tube of any length and for that reason, imagine you wanted to have some kind of device that would enable you to look into buildings at particular height - so what you can do is extend the tube, have a camera on the top of it and then look into say, the window of a burning building if you're a fireman or whatever, but you don't want to be carrying this around in the extended configuration. So you'd roll it up and stick in your backpack, it'll quite happily fit there because it's coiled and neatly packed.
Meera - Is there anything else we can also use these structures for?
Keith - What these little demonstrations have shown you is that, crucial to the performance of these is what you start off with as a basic shape. With the snap bracelet, what we thought of doing was taking several of them and linking them together to produce something which was a bit wider, rather than having just a single strip, several strips next to one another, then we had the idea of alternating those strips. What you end up with then is something that looks a bit like a corrugated sheet. Like a flick bracelet where we're able to give it pre-stress, we can make the corrugated sheet which is nominally flat, coil up into a cylinder.
Dave - This is actually a really quite nice design. Basically, it's a whole series of these tape measures next to each other, but one upside down and one in the right way up. But instead of separate tape measures, it's all just made out of a single sheet of metal which has been bent. And this means, that because it's actually got some depth, it's actually reasonably rigid as a flat sheet, but if you bend them beyond that point, it just starts to roll up into a tube, about 2 inches in diameter. And now, it's still quite a solid structure, but it's rolled up and takes up so much less space.
Keith - What this demonstrates is a very simple mock up of an application of our technology where you might want to give some support to a very flexible, thin electronic display. There are people out there in the electronics industry, trying to make displays as thin as possible to give them this nice, flexible feature. Electronic ink, electronic newspaper, but delicate structures nonetheless. What we're thinking is we'll put one of our sheets on the back of it to give it some strength and stiffness, but at the same time, not removing that rollability, that foldability, of the display or what it's offering, and at the same time, offering protection to the structure.
Dave - You could basically have a computer screen which is the size of laptop screen but protected because it's got this nice strong back that sits nice and flat, but when you click it, it will then roll up into something 2 inches across, you can put in your pocket. But it's still quite protecting. It's got this big metal sheet on the back and you can't crease it.
Meera - And so, with applications like this Keith, so eBook readers and electronic tablets, they're all very popular at the moment, and so in the future, we could just have thinner, more portable ones that would fit quite neatly into our bags and be protected.
Keith - I think that's where the industry might be heading. The thinner the display, the lighter it is, the less power it uses, but the more delicate it becomes, so you need some kind of protective backing in these and one that enables or imparts the shape changing capability that makes it easier to put in your pocket or wherever is something that would help.
Sarah - That would certainly make working on the move a lot better if you could just roll up your laptop and put it in your pocket. That was Dr. Keith Seffen from the University of Cambridge, talking to Meera Senthilingam and Dave Ansell for this week's Naked Engineering.

33:37 - Naked Engineering - Making Drugs
Naked Engineering - Making Drugs
with Andrew Robertson, GlaxoSmithKline
Kat - So we've heard how drugs like aspirin can be used and maybe how they work, but how are they actually made? For this week's Naked Engineering, Meera and Dave have been on a road trip to look at GlaxoSmithKline's tablet manufacturing site in Ware, Hertfordshire. Director of Innovation, Andy Robertson, showed them around...
Andy - At Ware we make a wide range of drugs. We make drugs that people will recognise for the disease they treat. We make drugs for HIV and AIDS. We also do a lot of drugs for cancer. So we have a wide range of products with a wide range of applications.
Meera - So, from the beginning, how are tablets made?
Andy - Well this site at Ware is what we call a secondary process site. So what we do is we bring in raw materials, active ingredients, and we have to measure them out in the same and correct ratios to form the tablet.
Dave - So I guess if you've got lots of different ingredients in there, they must have different jobs.
Andy - What goes into the tablet really depends on the product and each of the things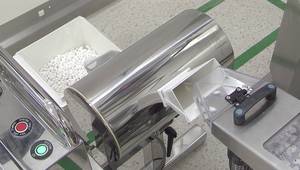 going into the tablet have a different function. For example, you might require to put a bulking agent in there, so if the active ingredient is strong, there wouldn't be enough to create a tablet. So you need a bulking agent to actually form the tablet. The other thing that you might need is a binder to bind the powders together, as well as a disintegrant...
Dave - ...To help you absorb it once it's in your stomach or whatever, to let the tablet fall apart and ensure it is absorbed quick enough.
Meera - Once this is all together, what next?
Andy - Well obviously, when they've been put all together in the correct ratio, we have to blend them to make sure they're all well-mixed so the blend becomes homogenised.
Dave - I guess this is a really critical step because if it's badly mixed, you might get one tablet which is all filler and another tablet which is all active ingredient.
Andy - Absolutely.
Meera - But what kind of scales are we talking about here? We're in one of your control rooms now and I can look out onto one of these large mixing bins. It's a meter wide and a meter high, so it's quite big.
Andy - Those bins hold up to 400 kilos, just put in context, those 400 kilo bins, can make up to 800,000 tablets.
---
Meera - One possible next step having mixed together the ingredients is granulation. So we're now in a large granulation room, standing by what looks like a hole in the ceiling, out of which the ingredients actually drop into this processor.
Andy - It is a bit like a food processor, so what you do is you put the contents of the bin into this food processor to change the properties of the material. So you're creating a granule and you're having to use a binding agent, and water.
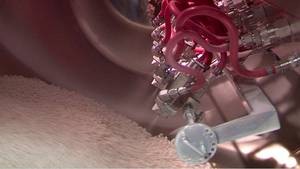 Dave - So instead of having a mixture of several different powders, you now have a load of granules. Each one is made up of all your different powders. This must stop the powders separating out in later parts of the process.
Andy - Absolutely, right. That's one of the main reasons for doing it. This machine makes granules and it discharges the granules through a wet mill and the purpose of the wet mill is to chop them up into very small bits again before it drops into a fluid bed dryer, and the fluid bed dryer, you can see it's 4 meters high. It's around a meter and a half in diameter. What that then does, it fluidises its powder by passing air through it continuously. This is aiming to dry off excess water out of the granule, but not too much that it becomes a powder again.
Meera - Coming out of the bottom then I imagine is the perfect formulation to then make a tablet.
Andy - It's nearly ready to be made into a tablet. Before we put it into a compression machine to make tablets, we add a lubrication substance called mag stearate (magnesium stearate). This allows the tablet to be pressed out of the tablet after forming without breaking it.
---
Meera - Now having gotten everything together, ingredients of the right consistency, it's now time to make tablets!
Andy - Yes, this tablet press you see in front of us here is making around 40,000 tablets an hour.
Meera - I'm not surprised that it's making so many because it's a cylinder whizzing around now and I can just see hundreds of tablets in the past minute that we've been here.
Andy - The way the tablet press works is a rotary die which is a plate with loads of holes in it, with two punches; top and bottom punches. So, as the plate goes around, the powder fills up all the holes and the punches then compress it into a tablet and then punch those tablets out.
Dave - And you're measuring how much powder you've got in there by basically, if it fills up the plate then that's going to be a consistent volume every time.
Andy - That's right.
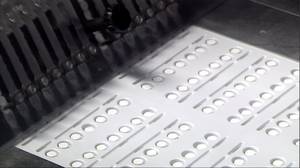 Meera - So now, we have tablets and they've been checked if they are correct, but what next between here and actually sending them out?
Andy - What we do before the tablets leave this facility is to coat the tablets in the coating machine. The coating process is rather like a tumble dryer where we're spraying liquid onto them and coating them slowly. Part of the reason for coating the tablet is to protect the ingredients from the environment, for example. It could also be masking any unpleasant taste when the patient takes the tablet, ease of swallowing the tablet, and it can even be used for improving the mechanical strength of the tablet.
Dave - I guess you can affect how it's dissolved so you put a coating on there which isn't dissolved in the acidic conditions of your stomach, so it can get through to the small intestine.
Andy - That's exactly right and after the coating process, the next step after that is actually the packaging process. So they can either be packed in what we call blister packs but they also can be packed into bottles.
Meera - We've now moved away from the actual manufacturing area on this site, but we've seen the ingredients being mixed, tablets being formed and coated, but Andy, how, throughout this process, are the tablets tested to make sure that they're all actually the same and uniform?
Andy - The quality assurance of the product is that each of the unit operations are fully understood and known, and all the critical parameters are monitored through the process. During each of those stages, samples are taken and insured the various test parameters are achieved. Such as, at the tablet press stage, we take the samples out and test for hardness, test for thickness, test for dissolution. As a result, we know that the quality of the product is good at all point in time.
40:34 - Engineering the Bouncing Bomb
Engineering the Bouncing Bomb
with Professor Hugh Hunt & Hilary Costello, University of Cambridge
Meera - Cambridge University's Hugh Hunt is a multi-talented engineer and he's recently been involved in a project that looked into the engineering behind the famous dam busters bouncing bomb used during World War II.
Dave - We joined him along by the River Cam in Cambridge to find out what's involved in designing something on a large scale to bounce on water.
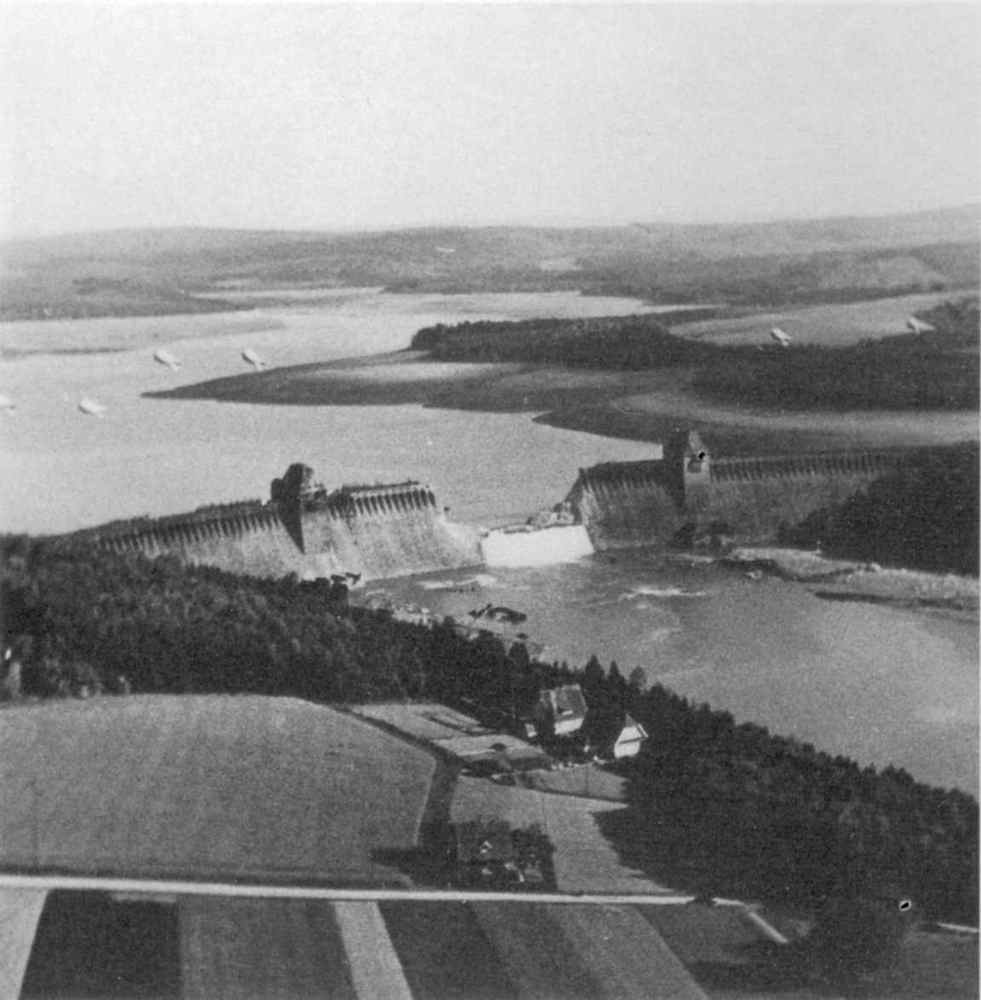
Hugh - Barnes Wallis, in 1943, came up with this great scheme for blowing up German dams - having a bouncing bomb, bouncing on the water, nestling up against the dam, dropping down beside the dam to a depth of about 20 feet and then blowing up just at the right height. It was successful, although there were quite a lot of lives lost, but the technology is really quite fascinating and hasn't been reproduced since 1943.
 Meera - Well, to find out more about the workings of this bouncing bomb, we've come along to the River Cam. It's a beautiful sunny day. Dave, why are we here?
Dave - One of the things which inspired Barnes Wallis to design the bouncing bomb was essentially just skipping stones on a river. Normally, when skipping stones, you get a nice flat stone, get very, very low towards the water, and you tend to throw it as hard as you can on a very, very flat trajectory, and with any luck, when it hits the water, it will skip.
Meera - Yep! So yours has just skipped twice over, which it's actually quite hard to accomplish.
Dave - So what's happening is the stone hits the water at a slight angle. When it hits the water, it gains lots and lots of lift, and it bounces off, and it skips a few times.
Meera - Hugh, is this basically the principle behind the bouncing bomb?
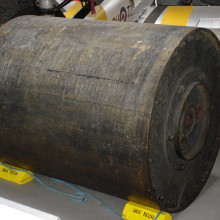
Hugh - Barnes Wallis was sort of inspired by skipping stones, but actually, he figured out with his kids in his backyard and that he could actually get marbles - ordinary round glass marbles - to bounce. The great thing about something round is that it can contain a reasonable volume. It is predictable, but actually, there is an even better shape than being spherical. If you have something which is cylindrical then you can fit more explosive power into the given space in the bomb bay of your Lancaster bomber.
Meera - This bouncing bomb is something that you set about recreating recently. Firstly, what you even have to consider when designing or engineering a bouncing bomb?
Hugh - First thing I suppose you have to do is to decide what size you're going to do it. Barnes Wallis had one which was about a metre and a bit in diameter. We went for half the size. Then we had to design how to fit it underneath the plane. We had to design how to make it spin and that was one of the things that Barnes Wallis found that's really important - that this thing had to spin. We had to figure out how to release it at the right time, at the right height, and actually, we had to make ourselves a target, and that was quite interesting because Barnes Wallis had German Nazi dams as a target. We built our own dams!
Meera - To see how you set about coming up with your design, we've got a variety of bits and bobs around us. We've got cricket balls here, we've got cylinders representing different scales of your bouncing bombs. So firstly, these cricket balls, what have you used these for?
Hugh - We started off on a small scale just with cricket balls. We used a cricket ball bowling machine in the Jesus Green swimming pool and we wanted to figure out how we could make cricket balls bounce, and we worked out the height and the angle and the speed, and that was great.
Dave - So how fast are you actually having to fire these cricket balls to get them to bounce satisfactorily?
Hugh - Well the ordinary lightweight ones, we could get them to bounce at maybe 30 or 40 miles an hour, but the heavier ones, once we started putting weights in them, we had to get maybe up to 50 or 60 miles an hour, except if you put backspin on them. And this was a eureka moment for Barnes Wallis back in the 1940s.
Meera - Why is backspin so important and how does it have that beneficial effect to the movement?
Hugh - Well, backspin is really important when the bomb goes through the air. Now if you think of Roger Federer and his topspin, topspin makes the ball dip over the net really fast. So you can imagine if you put topspin on a spinning bomb, it would just dive into the water and just sink. But backspin sort of hovers over the net and so, you can make it skim at a much shallower angle onto the water.
Dave - So the important thing is the angle that which the bomb hits the water and if that's too steep, it just digs straight in, but if you can get that shallow enough, it skips.
![A real '[[w:bouncing bomb|bouncing bomb]]' at [[w:Imperial War Museum Duxford|Duxford Imperial War Museum]] Photographed by Martin Richards Feb 2005 From [[:en:Image:Duxford_UK_Feb2005_bouncingbomb.JPG]] {{GFDL|migration=relicense}} Originally uploaded 20 February 2005 by [[:en:User:Bluemoose]] [[Category:Imperial War Museum Duxford]] [[Category:Bouncing bombs]] © Taragui Bouncing Bomb; Wallis](/sites/default/files/media/Duxford_UK_Feb2005_bouncingbomb_01.jpg) Hugh - That's absolutely right Dave, and if you have this thing called 'magnus lift' - the magnus effect is what it called - you can get a really nice sort of shallow angle under the water and we've got a really good demo how that works.
Hugh - That's absolutely right Dave, and if you have this thing called 'magnus lift' - the magnus effect is what it called - you can get a really nice sort of shallow angle under the water and we've got a really good demo how that works.
Meera - So here to actually show us just how important this is is Hillary Costello, one of Hugh's PhD students. Now Hillary, you've got two polystyrene cups there that have both been taped together at their bottom ends and then you have an elastic band which has been cut open.
Hillary - Well basically, this our cylinder, or bomb. It's a cylindrical polystyrene cup thing that we stuck together and then if you just wrap the string around, you can give it some either backspin or topspin, depending on how you throw it. So if I just wrap the elastic band around the cylinder or the polystyrene cups...
Meera - Okay , so you've wrapped that round now and so there's not much elastic band left...
Hillary - Yup! And then if I just pull the elastic band with my thumb so that the cups go forward when I release it, it gives it some backspin and you could see that it sort of hovers in the air before coming down.
Meera - So that actually hovered about a good meter away from you.
Hillary - Yeah.
Meera - Now you're just wrapping the elastic around again but in the opposite direction so that you'll have topspin.
Hillary - I actually just hold it from the top so that it has top spin and then when I release it...
Meera - That pretty much went straight down to the floor.
Hillary - Yeah, exactly. So, the backspin gives it a little bit of lift and the topspin gives it a downwards force.
Meera - And Hugh, so why do we need this backspin and for it to hover, I guess at a quite constant height?
Hugh - Well the idea really is to get the angle as shallow as possible. When you're skimming stones, we all know that you need to get it down as low as you can close to the water, but one of the problems that flying at night with gunfire, and all sorts of this stuff, you really don't want to be flying very, very close to the water. So, Barnes Wallis and his pilots figured they couldn't fly lower than 60 feet, the backspin enabled them to get a shallow angle of bounce on to the water.
Dave - So this basically stabilises it because otherwise, after the first bounce, it would start to tumble and it would go anywhere and stop skipping.
Meera - You've got a scale model here. It's a cylinder with a 180 millimetres or 18-centimetre diameter.
 Hugh - This is what we used to do some tests. In fact, it was in the Cotswolds. We got a gas cannon to fire this cylinder at a high speed across the lake and we had to make it spin. And you can sort of see that - if I toss this up in the air with no spin...
Meera - It's turned over. It's rotated.
Hugh - It turned over very quickly, but once I put spin onto it...
Meera - It smoothly just come straight back down to your hand.
Hugh - The spin stabilised and that was very important.
Meera - So what scales were you working to when you recreated your bouncing bomb?
Hugh - We've got the cricket balls here. We've got our 20-centimetre diameter scale over here. We've also got our 60-centimetre diameter bomb. It's actually a plastic replica because the real one is really heavy.
Dave - So, you were working with lots of different scales. It's not entirely obvious that you can transfer things you've learned at the size of a marble to something of a size of a person. Was it easy to take information you learned on the small scale to the largest scale?
Hugh - It's very interesting doing scale model tests. People designing aircraft do this all the time. You put a small scale model of an airplane in a wind tunnel and they'll learn how the aircraft works at that scale and then they'll scale it up to the big Airbus or Boeing full size aircraft. We did the same thing. We were able to use what's called dimensional analysis to scale up the effects we saw at the small scale cricket balls up to the bigger scale.
Meera - So we've established that scaling is important and backspin is crucial, but what about delivery? There are planes delivering these bombs so there must be something about the speed they're moving, the height that the bomb has actually dropped at, and so on?
Hugh - The critical parameters are speed; speed of the plane, height; the height that it's flying at, and how much you spin the bomb. And so, for a given diameter, it turns out that if you do dimensional analysis, the speed squared divided by the diameter and G - the acceleration of gravity - is dimensionless. That means that if you were to have a bomb which was twice as big, you would have to fly 40% faster - the square root of 2. It's important to know that scaling factor.
Meera - And so, moving back to you Hillary, just to conclude, having done all these tests with you, what were your final parameters to actually drop the bomb and explode the dam?
Hillary - From our testing, we determined that we needed to drop it 350 metres away from the dam, going 180 miles per hour, flying at 60 feet, and spinning the bomb at 800 rpm. It turned out that on our final run, the pilot decided to fly a little bit lower at 30 feet, so the bomb did hit a bit harder than anticipated, but it was a successful run. So, like Barnes Wallis, we bounced a bomb and blew up a dam.
Dave - Hillary Costello and before her, Hugh Hunt from the University of Cambridge, taking us through the process of designing a large scale bouncing bomb.
50:23 - When a Metallurgist met a Blacksmith
When a Metallurgist met a Blacksmith
with John Aveson, Cambridge University; Gordon Bevan, blacksmith in Eltisley.
Meera - For this week's Naked Engineering, I have a new partner in crime. It's John Aveson, a research student from the materials science department at the University of Cambridge. Now John, this week we're going to explore iron works and metal working...
John - That's right. Even though iron work has been done for about 4,000 years now, it's only the last 100 years or so that scientifically, we've kind of understood exactly what's going on during all of the processes. So the art of the blacksmith is really to take a piece of metal and do a series of processes to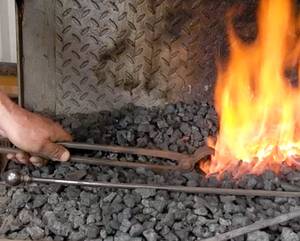 it to give you the shape that you want, but also the properties that you want, and that really happens by controlling the structure really, down to the atomic level.
Meera - So to see this in action, this week, we've come along to meet Gordon Bevan, a blacksmith based in Eltisley in Cambridgeshire.
Gordon - We make gates and railings, fire grates, anything to do with ironwork.
Meera - Well today, you're going to be making us a chisel. What are the main requirements of a chisel?
Gordon - We're going to form the material into a chisel shape and then we're going to harden it and then temper it.
John - So basically, once we've heated it, then it gets really easy to form into a certain shape that we want because materials tend to get softer the hotter they are.
Meera - Moving over to the forge now, what's the actual material burning underneath it. What's the fuel?
Gordon - It's coke.
John - Coke is just a sort of coal that's been treated to remove things like sulphur. Putting a load of sulphur in the iron will be really, really bad news for the properties of the work piece.
Meera - You've got a piece of metal heating up here in a bright orange flame, but what metal is this?
Gordon - It's a piece of tool steel.
John - Tool steel is just an alloy of iron and carbon, fairly small amounts of carbon in there. What makes it particularly good is that if you keep carbon contents low in iron, then it's possible to harden it really, really well without having the sort of brittleness of cast ions and other higher carbon content steels.
Meera - So Gordon is just pulling the metal out now and the end of it is bright orange, so it's just burning hot. What temperature must it be reaching, John?
John - It must be about 900 Celsius. Really, really high temperatures.
Meera - And so, what are you able to do with the metal at this high temperature, Gordon?
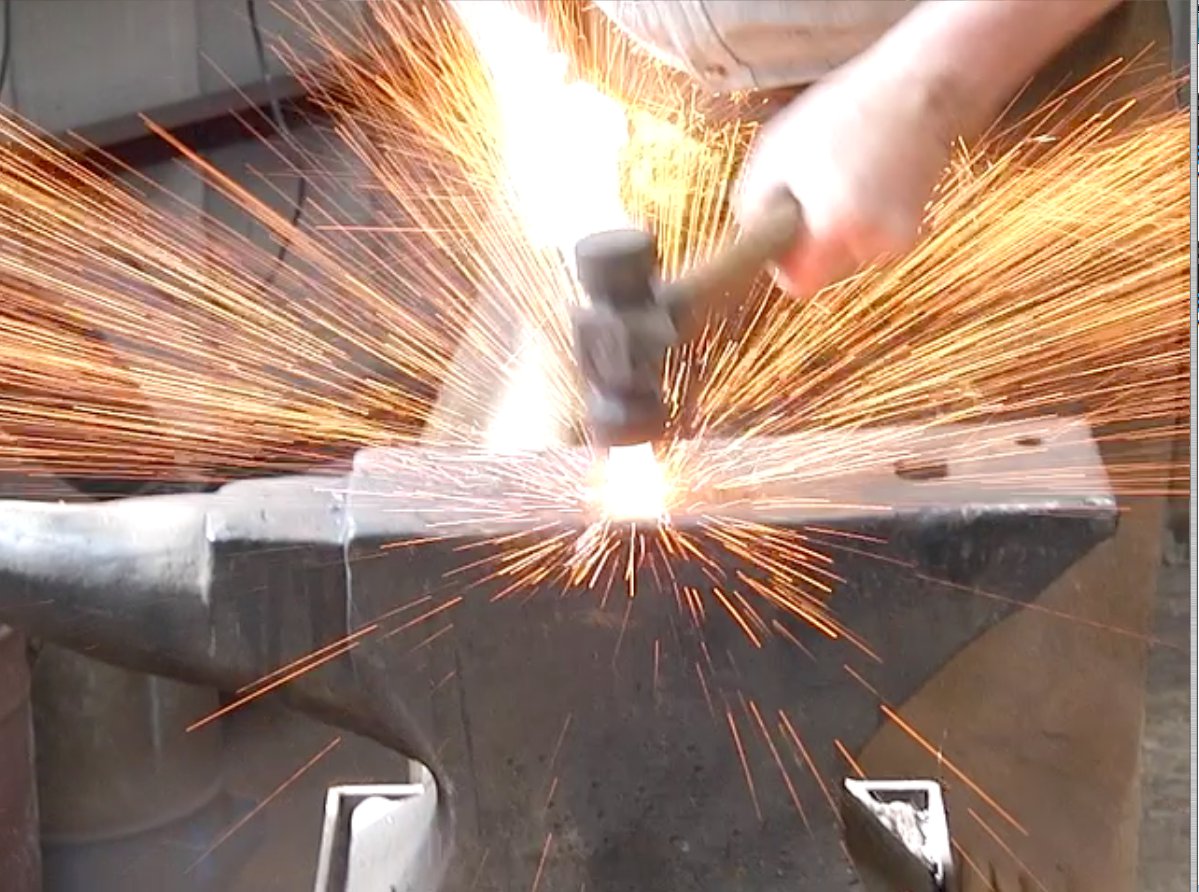 Gordon - The oranger it is or white, the softer it goes, so it's easier to hammer. Now when I hammer it, it's going to be easier to handle.
Meera - And John, what about the metal makes it extra bendy and malleable at such a high temperature?
John - Well there's two things. Atoms are just moving around a lot faster at high temperatures, so it's really easy to slide them past each other and permanently deform the material. But also, irons got this really, really unique property that at about 700 Celsius, it transforms from being one crystal structure to another and the higher temperature crystal structures are a lot easier to form. So that's two real reasons why it's so good to work when it's so hot.
Meera - Hence, why I guess when Gordon is hammering it and shaping it, the end has become quite nice and flat and sharp now.
John - Yeah, exactly.
Meera - What's the next step? You've heated it and you have bashed it pretty much into the shape you want.
Gordon - We're now going to harden it. We're going to quench it in some water.
Meera - So you're just dipping it into what just looks like regular - it's a bit dirty water, it's a bit murky, it's brown, but it's not like it's even ice cold water.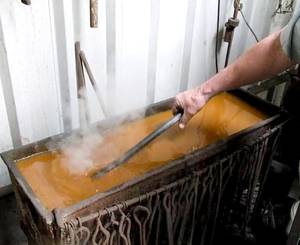 It's just simply room temperature water that you're dipping this into?
Gordon - That's right. It's probably warmer than room temperature because it's standing by the forge.
Meera - So a minute ago, this was reaching up to what, a thousand degrees or something and now, you're just handling it.
Gordon - It's now hard and cold.
Meera - So what has made it become hard simply by dipping it in this water, John?
John - Iron, especially carbon irons have this remarkable thing that when you quench them down from really high temperatures like 1,000 Celsius that we saw before, they form this crystal structure called martensite. It only happens when you cool things down really, really quickly and this structure is really, really hard, really hard to deform, hard to bend, but it's also is ridiculously brittle. So if we were to hammer it or to bend it or something, it would just shatter straight away.
Meera - So Gordon, you've made it malleable, bendy, and knocked into shape, hardened it by dipping it in the water. What's next? I mean, it's starting to really look like a chisel.
Gordon - I'm just going to clean it up now on the linisher, sharpen the end, and then it will be down to getting it hot again and tempering it.
Meera - You've placed it back into the forge now and one of the reasons you've cleaned it up is so you can see the colours at which it's burning?
Gordon - That's right. So I can see the colours, it should go straw. If I go past straw, it will go to the blue which will be too soft so I need to stop it before it gets to the blue stage.
Meera - And this is all the end of the chisel, so the bit that you've actually worked.
Gordon - Yeah.
John - The fact there are different colours gives us like a natural thermometer to tell us just by eye, how hot the steel is. We want to get a mixture, between the hard, brittle martensite with the much softer, but much more ductile and malleable low temperature iron structure. Just by judging the temperature, we can choose the mixture that we get between those two different types of crystal. That locks in the final properties of the tool.
Meera - So as Gordon mentioned, he doesn't want it to get to the blue colouring which is far too hot and so, is that therefore too malleable?
Gordon - Yeah. That would end up too malleable. Too much of the martensite would disappear and so, it wouldn't be hard enough to be a really useful tool. It's this last step that really locks in the properties that give the tool what it needs to do its job.
Meera - So looking at it now, it's got that straw colour which is what you wanted, but there is a bit of blue and so, you've pulled it out now. Is that now just to cool it down a bit to stop it being that blue?
Gordon - Yeah. I'll stop it when the chip gets to the straw colour like it's getting straw now, so now I've got to cool it off.
Meera - Interestingly this time to cool it, you haven't dipped it into room temperature water. You've dipped it into a box of oil.
Gordon - Used oil. It's slightly better than water.
John - The oil will take the heat out of the tool a lot more slowly and so, we can really lock in the crystal structures that we put in by just picking the colours perfectly on the tool before we quenched it. It's a lot more gentle and it's a lot nicer process to the poor bit of metal.
Meera - Okay so Gordon you're just pulling that out now and I don't really want to touch it. It's covered in oil.
Gordon - Just got to be wiped off and then we'll try it. Yeah, it's cold now so we can try it on the side of the anvil to see if it will cut.
Meera - Is it any good?
Gordon - It's not shattered and it's not dented. It's perfect.
John - So just using the skills of a blacksmith, Gordon's managed to control the atomic structure of a piece of iron to be able to cut another piece of metal perfectly. It's really, really amazing skills.
Chris - Cambridge researcher student John Averson and blacksmith Gordon Bevan explaining the art of metal working to Meera.



Comments
Add a comment